WildAsWhisk
To Homepage

How to set up WHISK

Plug together and set up.
Allen key, web app and email address – that’s all you need.

Setup & connect Try the app
ready to start?

Setup and connection

Put me together however you like –
I’m flexible. Very flexible.
  1. Choose a location

    First decide where WHISK should go. Place the base plate on a frame or edge and tighten it with the mounting clamps until nothing wobbles.

  2. Plug in the rods

    Plug rods (15, 30, 50 cm) and connectors together to the height and reach you want, and tighten.

  3. Mount WHISK

    Screw WHISK onto the rod. Insert a paddle, whip or cane and clamp it with the wing screws until nothing slips. Give the tool a pull to make sure it holds. Make sure the range of movement is clear.

  4. Connect power

    Plug in the power adapter, with the extension cable if needed. The light starts flashing yellow — WHISK is now looking for the last Wi-Fi network it was connected to. This takes about 30 seconds. Then the light turns solid yellow: WHISK is ready to be set up.

  5. Connect Wi-Fi

    On your phone, open the Wi-Fi settings and select the network WHISK . If a password is required, it is 12345678. On the next page, enter the name and password of your own Wi-Fi. Then tap Connect. When the light on the device turns green, WHISK is on your Wi-Fi and connected to the server.

  6. Set up app

    Scan the QR code on WHISK – the app opens. Under “Sign in”, enter your email address and confirm. You’ll get an email from WildAsWhisk with a 6-digit code – enter it in the app – done, WHISK is connected to the app.

  7. Test run

    Start at the lowest level in the app and let the full movement run once without a person. You can see how the app works further down. Once everything is tight, you’re good to go.

What the lights mean:

  • Flashing yellow — WHISK is looking for known networks.
  • Solid yellow — ready for setup, its own Wi-Fi is open.
  • Green — on Wi-Fi and connected to the server.

Setup ideas

Out of ideas?
I’ve got a few.
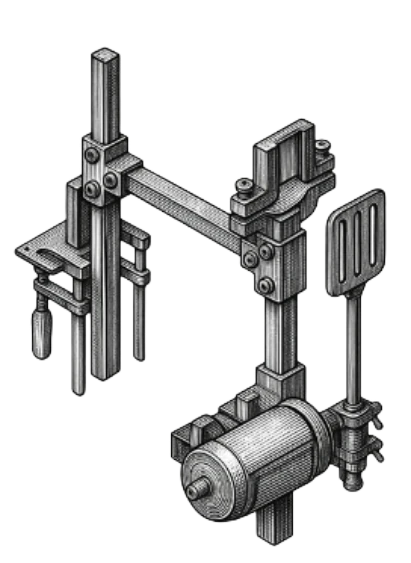
WHISK mounted on a table edge with a screw clamp

On the table (ballbusting)

Base plate on the table edge with screw clamps, one rod horizontally forward, the second pointing down via a connector. WHISK sits at the bottom end, WHISK’s Ball Trap at the top.

You need: 2 screw clamps · rod with base plate · 3 connectors · rods 15, 30 and 50 cm · WHISK · spatula · WHISK’s Ball Trap
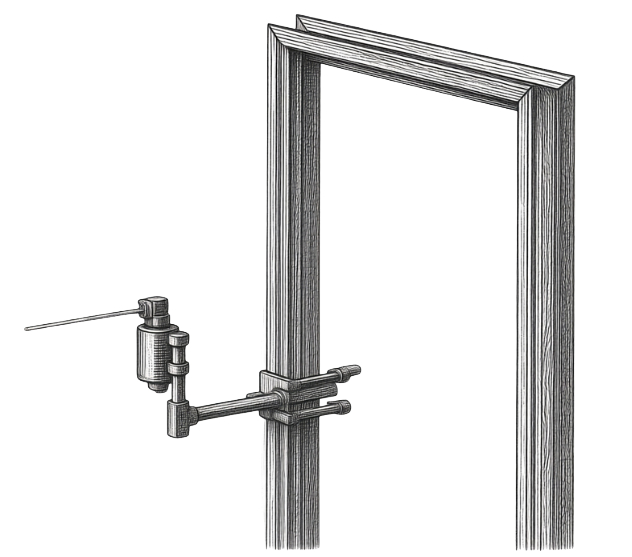
WHISK clamped to a door frame

On the door frame

Base plate on the door frame with two clamps, one rod horizontally forward, a shorter rod pointing up via a connector. Screw WHISK on there. Ideal for standing play.

You need: 2 mounting clamps · base plate rod 50 cm · 1 rod 18 cm · 1 connector · WHISK · cane
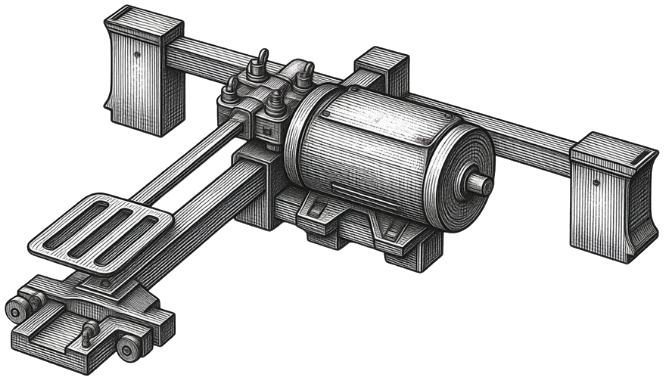
Bed pillory setup with WHISK

Bed pillory

Crossbar with two clip-on cuffs for the feet, a long rod forward from the middle between the legs. WHISK’s Ball Trap at the front, WHISK on the rod with another connector, adjust the height. WHISK strikes exactly where you’re held down.

You need: 2× rod 50 cm · 1× rod 18 cm · WHISK · striking implement · WHISK’s Ball Trap · 2 clip-on cuffs · connectors
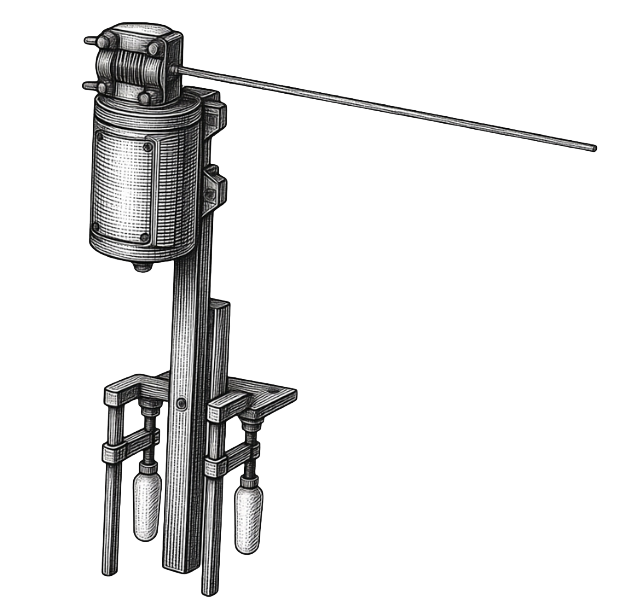
WHISK set up on a bedside table

On the bedside table

Clamp the rod with base plate to the edge of the bedside table and mount WHISK directly on it. Ideal for lying down.

You need: 2 mounting clamps · base plate rod · WHISK · cane
try it

The app in your hand

Before you play: WHISK is a toy for consenting adults. Check clamps and connections before every session.

  • Clamps, screws, rods and impact tool must be tight – nothing may wobble.
  • Set the set and hit positions and full/partial turn before every session and test once without a person.
  • Never leave WHISK running unattended.
  • Always start at the lowest intensity and increase slowly.
  • Agree on a safeword and keep a line of communication open during remote play.
  • Do not use under the influence of alcohol or drugs.
  • For people aged 18 and over only.
  • Get familiar with the WHISK safety instructions .
